Tuesday, March 19, 2013
5 Fun Ways to Glitch and Cheat with Ender Pearls
Hello, I'm N8thanH, and welcome back to Across the Map!
As many of you may know, you can throw an Ender Pearl in Minecraft to teleport to where it lands. What some of you may also know, something of this nature is easily exploitable. So, today I thought I'd show you guys some fun ways to use Ender Peals to cheat through or over walls,go through ceilings, skydive safely, or just downright impress your friends!
For starters, I'll demonstrate a simple way to go through thin walls (glass panes and iron bars). But first, make sure you have lots of Ender Pearls, unless you are a very well-practiced glitcher, or the wall isn't very tall.
Let's start with a short wall like this one. I put a 3-block thick roof on to show you that you can cheat through most ceilings.

Just walk up to the wall, and throw Ender Pearls until you appear...
(Or you can throw into the ceiling. Whatever is your forte. However, the ceiling may be a bad idea if it is really high.)

...On the other side!

(Pro tip: Respiration and Feather Falling enchantments can be game changing when doing these stunts.)
Alright. Wanna try a bigger wall? Sure you do. Let's do it!

Again, same thing as before. Actually, I found it to be a bit more effective if you look up on an angle like this. Also, I personally find it easier to get on to a platform if you go through the floor. Just a preference.

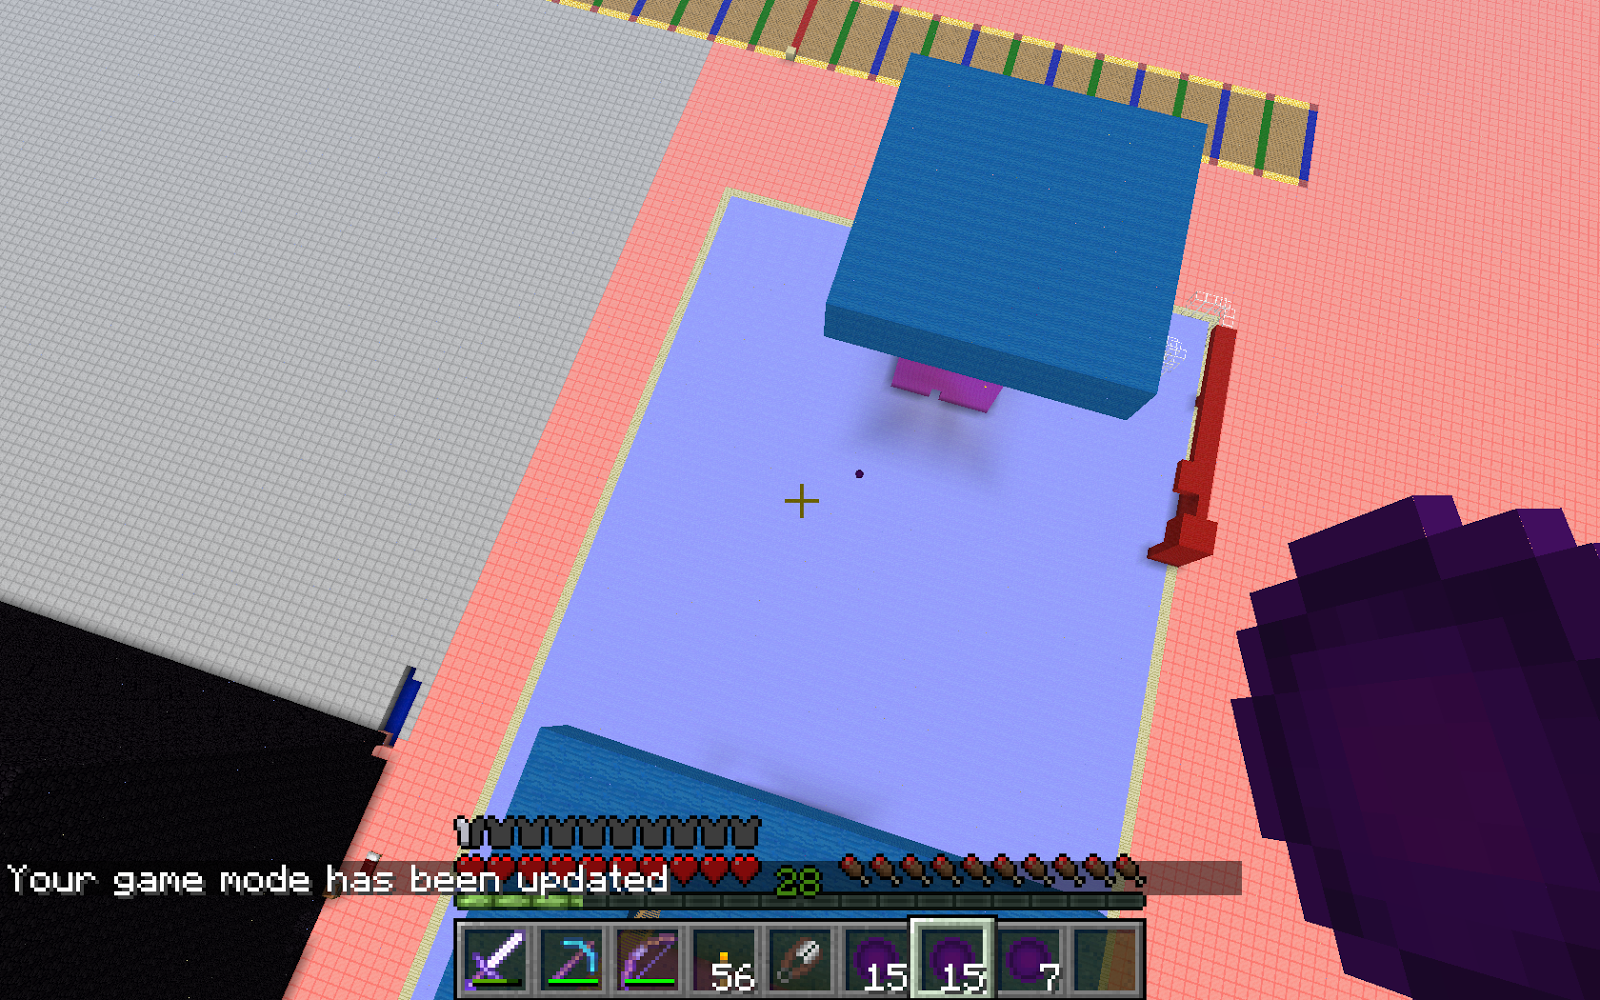
This next trick is quite fun! In my case, I'm a spider-slime! This is good for scaring/impressing friends, sniping stuff, or just scoping out an area. to do this, just look up at a wall at a similar angle to in the screenshot above, while walking forward. When you start shaking back and forth, you can then let go of your keys.
Tips: holding sneak may be helpful for not falling, or getting out of the block if you start suffocating. Feather Falling can be VERY helpful while attempting this.

Now, I think I'll demonstrate how to go through the ceiling, or come through the floor. Depends on the case. This one is fairly straight forward: just rapidly throw Ender Pearls while looking straight up at the roof! If you have enough pearls, (3 stacks should be more than enough) you can even escape a cave and appear on the surface! (Just make sure there isn't anything dangerous above you, like lava. Also, this is where respiration comes in handy.)
Let's climb that tower I climbed before! I'll see yu guys on the top! Anyways, here I go! :D

Ta-da! Here we are!!!

For my next trick, I will jump from this platform, and live!

Now, to pull this one, just spike an Ender Pearl straight up, (maybe wait a few seconds) and jump! (Just make sure you are high enough that you don't hit the ground. If that happens, it will wreck the whole trick, and the joke's on you.) Once again, this is useful for avoiding or tricking people if you have Ender Pearls in PvP, or just for impressing friends. I have done both before!
Wee!

WHOOSH!!! Here I am, safe and sound at the top once again! Yaay! :D

Now to get back down, and I'm to impatient and cool for ladders! I know...
My last stunt will be to fall really far, but take little damage, using Ender Pearls! This is actually really easy: just throw the pearl toward the ground, and jump!
But first, as bad of a time it is, like always, it's time for the Impromptu Random Bonus Screenshot of the Day!
Today we see a star-gazing creeper that I caught and punched while giving a tour of my Japanese house. Remember that post?

My caption: "Star light, star bright... OW! You made me lose the first star of the night! Now I can't make a wish!"
Back to what I was doing...
Well, there goes the Pearl!
 There I go!

Boom! Here I am, safely at the bottom!

Uses: this is a great trick for impressing friends, again, or for if you get mixed up when Ender Pearling down from places.
Anyways, that's all the Ender Pearl tricks I have up my sleeve for now!
So, as always, please comment, and thanks for stopping by my blog!
See you all next post. Until then!
As many of you may know, you can throw an Ender Pearl in Minecraft to teleport to where it lands. What some of you may also know, something of this nature is easily exploitable. So, today I thought I'd show you guys some fun ways to use Ender Peals to cheat through or over walls,go through ceilings, skydive safely, or just downright impress your friends!
For starters, I'll demonstrate a simple way to go through thin walls (glass panes and iron bars). But first, make sure you have lots of Ender Pearls, unless you are a very well-practiced glitcher, or the wall isn't very tall.
Let's start with a short wall like this one. I put a 3-block thick roof on to show you that you can cheat through most ceilings.

Just walk up to the wall, and throw Ender Pearls until you appear...
(Or you can throw into the ceiling. Whatever is your forte. However, the ceiling may be a bad idea if it is really high.)

...On the other side!

(Pro tip: Respiration and Feather Falling enchantments can be game changing when doing these stunts.)
Alright. Wanna try a bigger wall? Sure you do. Let's do it!

Again, same thing as before. Actually, I found it to be a bit more effective if you look up on an angle like this. Also, I personally find it easier to get on to a platform if you go through the floor. Just a preference.

This next trick is quite fun! In my case, I'm a spider-slime! This is good for scaring/impressing friends, sniping stuff, or just scoping out an area. to do this, just look up at a wall at a similar angle to in the screenshot above, while walking forward. When you start shaking back and forth, you can then let go of your keys.
Tips: holding sneak may be helpful for not falling, or getting out of the block if you start suffocating. Feather Falling can be VERY helpful while attempting this.

Now, I think I'll demonstrate how to go through the ceiling, or come through the floor. Depends on the case. This one is fairly straight forward: just rapidly throw Ender Pearls while looking straight up at the roof! If you have enough pearls, (3 stacks should be more than enough) you can even escape a cave and appear on the surface! (Just make sure there isn't anything dangerous above you, like lava. Also, this is where respiration comes in handy.)
Let's climb that tower I climbed before! I'll see yu guys on the top! Anyways, here I go! :D

Ta-da! Here we are!!!

For my next trick, I will jump from this platform, and live!

Now, to pull this one, just spike an Ender Pearl straight up, (maybe wait a few seconds) and jump! (Just make sure you are high enough that you don't hit the ground. If that happens, it will wreck the whole trick, and the joke's on you.) Once again, this is useful for avoiding or tricking people if you have Ender Pearls in PvP, or just for impressing friends. I have done both before!
Wee!

WHOOSH!!! Here I am, safe and sound at the top once again! Yaay! :D

Now to get back down, and I'm to impatient and cool for ladders! I know...
My last stunt will be to fall really far, but take little damage, using Ender Pearls! This is actually really easy: just throw the pearl toward the ground, and jump!
But first, as bad of a time it is, like always, it's time for the Impromptu Random Bonus Screenshot of the Day!
Today we see a star-gazing creeper that I caught and punched while giving a tour of my Japanese house. Remember that post?

My caption: "Star light, star bright... OW! You made me lose the first star of the night! Now I can't make a wish!"
Back to what I was doing...
Well, there goes the Pearl!

Boom! Here I am, safely at the bottom!

Uses: this is a great trick for impressing friends, again, or for if you get mixed up when Ender Pearling down from places.
Anyways, that's all the Ender Pearl tricks I have up my sleeve for now!
So, as always, please comment, and thanks for stopping by my blog!
See you all next post. Until then!
Wednesday, March 6, 2013
Simple Auto-Brewer in 1.5
Hello, I'm N8thanH, and welcome back to Across the Map!
Today, I have built an automatic brewing machine with the hopper blocks introduced in the snapshots of Minecraft 1.5.
Here's how to use it.

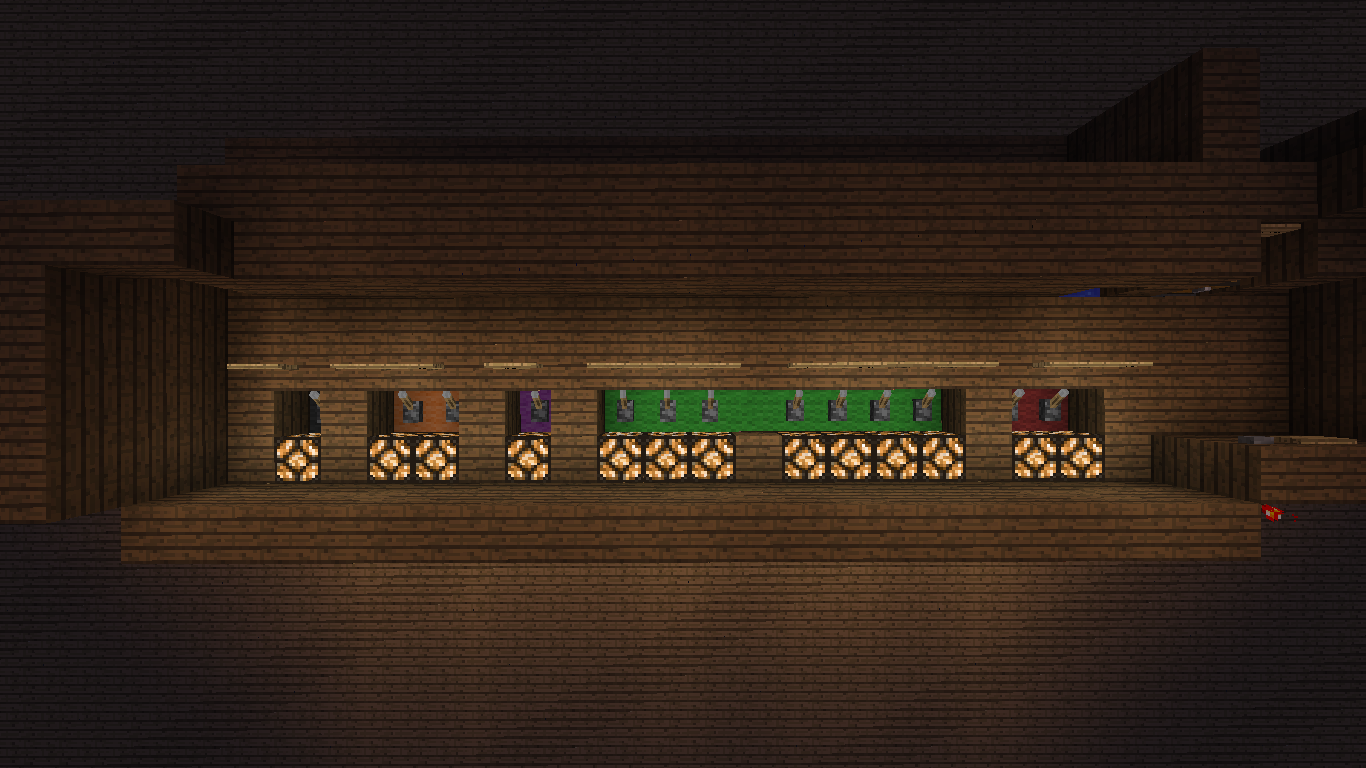
Here we have a room with lots of switches. When this machine dispenses the ingredients, it will do it in order of: red, green, purple, orange, grey. Keep that in mind.

So, let's say that you accidentally hurt your pet cat again, and need some potions of healing. Let's solve that.

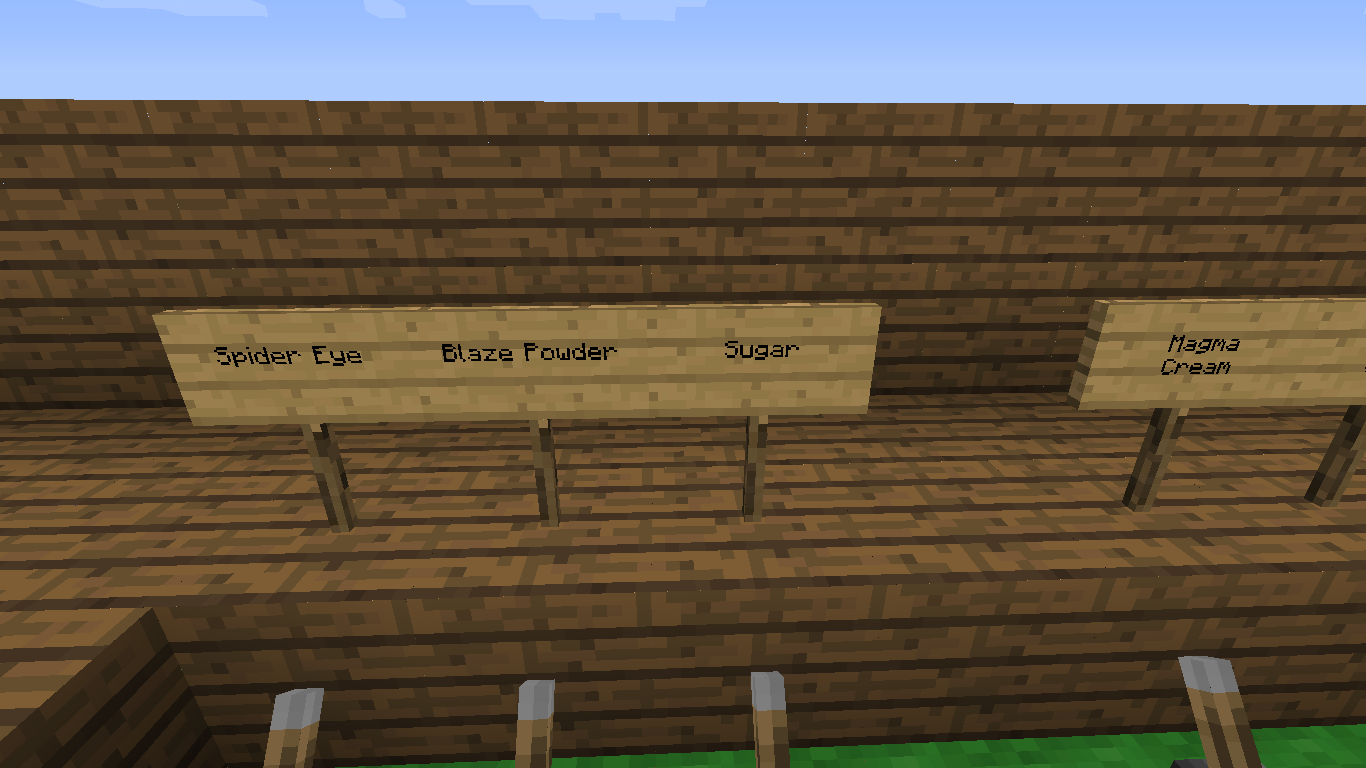
Let's look at the available ingredients. Again, keep in mind the order of the colors when dispensing.
Ingredient 1 and 2 choices.
 More of the ingredient 2 choices.

Ingredients 3 through 5.

So, I pulled the levers for the necessary ingredients:
1. Nether wart, the usual base.
2. Glistering Melon, for the instant health effect.
3. None, because I didn't want a fermented spider eye.
4. Glowstone dust, for a stronger effect.
5. Gunpowder, so I can throw it at my pet cat, Atom. (Yeah, probably need a better name. :p )
Next, let's load this thing with some bottles! We just need to put the water bottles in here. That little water hole is just meant for filling your water bottles.

Anyway, now that we've loaded this device, all we have to do next is push this button. This will add the ingredients, and start the brewing.

Now that everything is cooking, let's head downstairs to see what's up. This ladder will take us there.

At the bottom, we have this room. Here, we can eject the potion batch, if we want to, or just check on the progress.

Do you remember that order of dispensing? In the hopper above the brewing stand, we can see our ingredients, in that order. Just note that in this screenshot, the Nether wart is in the stand, being brewed into the bottles.

So, that is all I have to show right now. So, let's do a time-skip to when the potions are done!
Whoosh! Our potions are done!!! As you can see in this screenshot, we have our splash potions of instant healing level 2 right here. Just what the doctor ordered! Wait. I'm making potions to heal a cat! That's kinda funny. Honestly. No joke intended. :D

Moving on, let's go heal Atom, and take a look at some of the redstone.
Here you go buddy! Sorry I hit you.

Anyway, here's the redstone that triggers the droppers. If you can see where the repeaters point into the wall (which connect to the droppers), just note that the droppers dispense the ingrdients into a water flow, which then pushes the items into the hopper that holds the ingredients.

And you see those redstone torches attached to wool? Those wool blocks happen to be the same ones that are part of the ingredient selection panel. By deactivating the levers, you enable the corresponding torch to turn on and trigger the droppers when that wire to the far right turns on, and that wire is connected to the "dispense ingredients" button. So, that's about it for the majority of the redstone here!
Well, that's it for today! If you guys want a tutorial on how to build one, just tell me in the comments.
As always, please give feedback, and thanks for stopping by my blog!
See you all next post. Until then!
Today, I have built an automatic brewing machine with the hopper blocks introduced in the snapshots of Minecraft 1.5.
Here's how to use it.

Here we have a room with lots of switches. When this machine dispenses the ingredients, it will do it in order of: red, green, purple, orange, grey. Keep that in mind.
So, let's say that you accidentally hurt your pet cat again, and need some potions of healing. Let's solve that.

Let's look at the available ingredients. Again, keep in mind the order of the colors when dispensing.
Ingredient 1 and 2 choices.

Ingredients 3 through 5.

So, I pulled the levers for the necessary ingredients:
1. Nether wart, the usual base.
2. Glistering Melon, for the instant health effect.
3. None, because I didn't want a fermented spider eye.
4. Glowstone dust, for a stronger effect.
5. Gunpowder, so I can throw it at my pet cat, Atom. (Yeah, probably need a better name. :p )
Next, let's load this thing with some bottles! We just need to put the water bottles in here. That little water hole is just meant for filling your water bottles.

Anyway, now that we've loaded this device, all we have to do next is push this button. This will add the ingredients, and start the brewing.

Now that everything is cooking, let's head downstairs to see what's up. This ladder will take us there.

At the bottom, we have this room. Here, we can eject the potion batch, if we want to, or just check on the progress.

Do you remember that order of dispensing? In the hopper above the brewing stand, we can see our ingredients, in that order. Just note that in this screenshot, the Nether wart is in the stand, being brewed into the bottles.

So, that is all I have to show right now. So, let's do a time-skip to when the potions are done!
Whoosh! Our potions are done!!! As you can see in this screenshot, we have our splash potions of instant healing level 2 right here. Just what the doctor ordered! Wait. I'm making potions to heal a cat! That's kinda funny. Honestly. No joke intended. :D

Moving on, let's go heal Atom, and take a look at some of the redstone.
Here you go buddy! Sorry I hit you.

Anyway, here's the redstone that triggers the droppers. If you can see where the repeaters point into the wall (which connect to the droppers), just note that the droppers dispense the ingrdients into a water flow, which then pushes the items into the hopper that holds the ingredients.

And you see those redstone torches attached to wool? Those wool blocks happen to be the same ones that are part of the ingredient selection panel. By deactivating the levers, you enable the corresponding torch to turn on and trigger the droppers when that wire to the far right turns on, and that wire is connected to the "dispense ingredients" button. So, that's about it for the majority of the redstone here!
Well, that's it for today! If you guys want a tutorial on how to build one, just tell me in the comments.
As always, please give feedback, and thanks for stopping by my blog!
See you all next post. Until then!
Subscribe to:
Posts (Atom)
\8D/

My ever-changing Minecraft skin...
Fire_Cat2000's Blogs
-
Brown Paper Bag Owl Craft - Fire_Cat Here!! And welcome back to another post. Today we will be making... This Cutie!!! This Brown Paperbag Owl craft is easy to make and fun. Let's ...

-
More Food "Monday" # 3 - Pancakes - Fire_Cat Here! And welcome back to More Food Monday. (Wellllll, Tuesday.) On today's menu are... Pancakes!! Let's get started! First step, put togethe...


Post a Comment