Sunday, February 3, 2013
Peaceful Maps - Early Tour of My Map and How to make your own!
Hello, I'm N8thanH, and welcome back to Across The Map!
Allow me to explain this whole thing.
If any of you have seen AntVenom's channel, (link to the side of my page, plugplugplugplug) you may be familiar with his Peaceful Map. In that world, he builds structures that are close to each other, have some whatsoever use, and look pleasing to the eye. Lately, I have been craving lots of building for some reason, and I thought it would be a good idea to start a Peaceful Map of my own, so I did.
I have built a bit, and will be touring what I have built, as well as explaining how to build your own Peaceful map, and why you may want one.
Without further adieu, let's start the tour of my Peaceful Map!
Let's start right here, at the house. It's not as spectacular as some of my other homes, but I'm satisfied with it. Hey, the glass ceiling is cool, right? You'll see it in a minute.

Here's the kitchen. The usual design Fire_Cat2000 and I use.

The living room, across from the kitchen. As always, I used Fire_Cat2000's couch design. Love those couches of her's!
Let's go upstairs.

This is the second floor/loft. Another sitting area here, too. If I have more than one guest on this map, these couches can serve as beds.

A bedroom. They are fairly small, but they're cozy!

Moving on, here's the basement/hub. It's down the staircase I went up to access the upstairs. Oh, and yes that's a spider-face rug. *Hiss!*

The room, as seen from the opposite side.

Mah workshop! I kinda went overkill with the furnaces.

Um, yeah.

Oh, yes, here's a closer look at the storage room, just in case you were curious. I have quite a few chests, but they aren't very full. Some only have like three different stacks of items.

Moving on, we'll be heading this way next. (Sorry the sign text is blurry. It says: 'The Clay Basin'.)

Here we are! This is the entrance to The Clay Basin. Let's head inside, and I'll explain what The Clay
Basin is, or better yet, show you.


The shop is locked right now. Let's press this button to teleport me (This button only lets ME in, FYI.)
inside.
Here we are! Can you tell what this place is? Whatever it is, it seems like it's closed.

If not, I'll flip this switch for you all, and all shall become clear! :D

What's happening?

Ta-da! It's a restaurant!

That is, a restaurant and pool. The lights in the pool also turn off when the lever is deactivated.
The pool is supposed to be a giant basin that is being used to extract clay out of dirt. There is actual clay at the bottom to suggest that idea. So, yeah, a clay (extraction) basin.

Here's the kitchen. As you can see, there are some cabinets, a refrigerator, some ovens/stoves, and a cutting board. Perfect for preparing meals for your customers.

You may ask: "N8, what is the Clay Basin's purpose?" Well, the reason I built it is for if I have guests on this map, I can use this shop to entertain and feed them.
That's all there is to see underground, and this post is getting long. So, I'll meet you guys in front of the house, so I can finish off this tour, as fun as this has been for me, and I hope for you guys too.
Here I am, floating above the area in front of the house. I'll be heading over to that glass tower.
And yes, I updated my skin, thanks for asking. :D Now a lot smoother and better shaded. I blend right in in FreshCraft!

Allow me to also point out two quick things. That green manhole thing is a ladder going into my basement, and I do have a little flower garden. Just some features I wanted you guys to see.
Anyways, here's better look at the Greenhouse's design. (Sorry to disappoint, but no, there are no secrets or Easter eggs here. :p Maybe soon... No promises, though.)

This greenhouse can auto-harvest anything at the push of a button.
Let's play with the farms!
First of all, here's the wheat farm.
When you push the button on the dispenser block, it will knock out the crops.

The water flooding the farm

This is the pumpkin and melon farm. Again, push button to harvest. Pistons will push and retract the dirt, uprooting the fruits.

The farm while the pistons are extended. A moment later, they will retract, pulling the dirt back with them.

Here we have the sugar cane farm. The pistons here will cut the stocks for you.

The stocks being cut.

We interrupt this non-scheduled blog post to bring you the Impromptu Random Bonus Screenshot of the Day!
Here, we see a large tunnel going up, with an unexpected skeleton hiding in the shadows.

My caption: Wow! What a beautiful cave! I'll take a photo! *Twaaang!* Hey! That skeleton photo bombed my shot!
Last but not least out of the farms, we have the potato and carrots. Same setup as the wheat farm.

The harvesting in action.

Our last destination is the animal tower. I don't need to go through every part of it, since every floor is a rotated version of the one before. Well, mostly.

So, this concludes the tour part of this post. Time to talk about why you should make a Peaceful Map, and how to start and build one.
To make a Peaceful Map, First of all, I recommend you generate a default or large biomes world type. (When you spawn the world, don't forget to learn the commands and enable cheats.) Try to find a flat area near the spawn point. Forests work best, in my opinion.
Try to build your structures as close as possible. Five blocks away is best, also in my opinion. Connect your underground constructions to your house's basement. Don't forget to try thinking of ways to test your ability to build constructions that are as good-looking as you can make them, and also test your redstone knowledge.
Some good map rules are to build in Creative, but don't bring summoned items back to survival, and do everything else legitimately. Use peaceful as your default difficulty, and increase it when you feel like monsters. You may want to also try building things with a purpose.
The last thing I want to talk about today (sorry, I know this is a long post) is some scenarios where I recommend you try your hand at a Peaceful Map.
A. If you do a lot of survival building, this may be a good chance to relax about building.
B.For you creative mode players, a Peaceful Map may be a good chance to implement some survival mode into your game.
C. Do you like hanging out with friends? What better kind of world to chill with your homeys in?
Well, that's it for today! Expect to hear more about my map in future posts! Full credit goes to AntVenom for inventing the concept.
Sorry this post turned out kinda long. And as always, please comment, and thanks for stopping by my blog!
Once again, I'm N8thanH, and I'll see you all next post. Until then!
Allow me to explain this whole thing.
If any of you have seen AntVenom's channel, (link to the side of my page, plugplugplugplug) you may be familiar with his Peaceful Map. In that world, he builds structures that are close to each other, have some whatsoever use, and look pleasing to the eye. Lately, I have been craving lots of building for some reason, and I thought it would be a good idea to start a Peaceful Map of my own, so I did.
I have built a bit, and will be touring what I have built, as well as explaining how to build your own Peaceful map, and why you may want one.
Without further adieu, let's start the tour of my Peaceful Map!
Let's start right here, at the house. It's not as spectacular as some of my other homes, but I'm satisfied with it. Hey, the glass ceiling is cool, right? You'll see it in a minute.
Here's the kitchen. The usual design Fire_Cat2000 and I use.
The living room, across from the kitchen. As always, I used Fire_Cat2000's couch design. Love those couches of her's!
Let's go upstairs.
This is the second floor/loft. Another sitting area here, too. If I have more than one guest on this map, these couches can serve as beds.
A bedroom. They are fairly small, but they're cozy!
Moving on, here's the basement/hub. It's down the staircase I went up to access the upstairs. Oh, and yes that's a spider-face rug. *Hiss!*
The room, as seen from the opposite side.
Mah workshop! I kinda went overkill with the furnaces.
Um, yeah.
Oh, yes, here's a closer look at the storage room, just in case you were curious. I have quite a few chests, but they aren't very full. Some only have like three different stacks of items.
Moving on, we'll be heading this way next. (Sorry the sign text is blurry. It says: 'The Clay Basin'.)
Here we are! This is the entrance to The Clay Basin. Let's head inside, and I'll explain what The Clay
Basin is, or better yet, show you.
inside.
Here we are! Can you tell what this place is? Whatever it is, it seems like it's closed.
If not, I'll flip this switch for you all, and all shall become clear! :D
What's happening?
Ta-da! It's a restaurant!
That is, a restaurant and pool. The lights in the pool also turn off when the lever is deactivated.
The pool is supposed to be a giant basin that is being used to extract clay out of dirt. There is actual clay at the bottom to suggest that idea. So, yeah, a clay (extraction) basin.
Here's the kitchen. As you can see, there are some cabinets, a refrigerator, some ovens/stoves, and a cutting board. Perfect for preparing meals for your customers.
You may ask: "N8, what is the Clay Basin's purpose?" Well, the reason I built it is for if I have guests on this map, I can use this shop to entertain and feed them.
That's all there is to see underground, and this post is getting long. So, I'll meet you guys in front of the house, so I can finish off this tour, as fun as this has been for me, and I hope for you guys too.
Here I am, floating above the area in front of the house. I'll be heading over to that glass tower.
And yes, I updated my skin, thanks for asking. :D Now a lot smoother and better shaded. I blend right in in FreshCraft!
Allow me to also point out two quick things. That green manhole thing is a ladder going into my basement, and I do have a little flower garden. Just some features I wanted you guys to see.
Anyways, here's better look at the Greenhouse's design. (Sorry to disappoint, but no, there are no secrets or Easter eggs here. :p Maybe soon... No promises, though.)
This greenhouse can auto-harvest anything at the push of a button.
Let's play with the farms!
First of all, here's the wheat farm.
When you push the button on the dispenser block, it will knock out the crops.
The water flooding the farm
This is the pumpkin and melon farm. Again, push button to harvest. Pistons will push and retract the dirt, uprooting the fruits.
The farm while the pistons are extended. A moment later, they will retract, pulling the dirt back with them.
Here we have the sugar cane farm. The pistons here will cut the stocks for you.
The stocks being cut.
We interrupt this non-scheduled blog post to bring you the Impromptu Random Bonus Screenshot of the Day!
Here, we see a large tunnel going up, with an unexpected skeleton hiding in the shadows.
My caption: Wow! What a beautiful cave! I'll take a photo! *Twaaang!* Hey! That skeleton photo bombed my shot!
Last but not least out of the farms, we have the potato and carrots. Same setup as the wheat farm.
The harvesting in action.
Our last destination is the animal tower. I don't need to go through every part of it, since every floor is a rotated version of the one before. Well, mostly.
So, this concludes the tour part of this post. Time to talk about why you should make a Peaceful Map, and how to start and build one.
To make a Peaceful Map, First of all, I recommend you generate a default or large biomes world type. (When you spawn the world, don't forget to learn the commands and enable cheats.) Try to find a flat area near the spawn point. Forests work best, in my opinion.
Try to build your structures as close as possible. Five blocks away is best, also in my opinion. Connect your underground constructions to your house's basement. Don't forget to try thinking of ways to test your ability to build constructions that are as good-looking as you can make them, and also test your redstone knowledge.
Some good map rules are to build in Creative, but don't bring summoned items back to survival, and do everything else legitimately. Use peaceful as your default difficulty, and increase it when you feel like monsters. You may want to also try building things with a purpose.
The last thing I want to talk about today (sorry, I know this is a long post) is some scenarios where I recommend you try your hand at a Peaceful Map.
A. If you do a lot of survival building, this may be a good chance to relax about building.
B.For you creative mode players, a Peaceful Map may be a good chance to implement some survival mode into your game.
C. Do you like hanging out with friends? What better kind of world to chill with your homeys in?
Well, that's it for today! Expect to hear more about my map in future posts! Full credit goes to AntVenom for inventing the concept.
Sorry this post turned out kinda long. And as always, please comment, and thanks for stopping by my blog!
Once again, I'm N8thanH, and I'll see you all next post. Until then!
Monday, January 21, 2013
Beachside Bungalow - Building Tutorial
I am on vacation right now. (Actually, that's kinda a lie. I've been procrastinating about finishing this post.) Feeling pretty darn mellow and laid back right now. Today, I think I'll show you guys how to build something mellow and laid back, too: the Beachside Bungalow.
Note that this house design is fully possible to build in survival.
This is what the finished product looks like.

(Sorry for the lack of in-game video quality (this laptop is slow and old) and FreshCraft (I forgot to transfer the pack :p ) this post.)
Anyways, let's get started!
The very first thing you want to do is place down one log. This will be the far front-right corner of the house.

Step two is to build a rectangle out of logs (for this build, I am using jungle logs) that is wider than it is long, like so. This is the start of the porch. Replace the logs with stairs along the front-left edge. I recommend placing 2 or 3 stair blocks.

Place a fence along the front and right edge (not over the stairs). On top of the far front-right corner block, (the first one I instructed to place) make a pillar of fences going up five blocks. (Four if you are doing a three-block high ceiling.)
Stupidity alert! I will be doing a four-block high ceiling, but I did a four-block high pillar (for a three-block high ceiling)!
When the fence is done, the porch should look like this:

Note: if you put a fence along any edges that I don't instruct to do, it will throw off the whole building project.
Now it's time to plan out the walls! Make a rectangular perimeter, with the porch being part. Place walls along the left and back edges of the porch.
Actually, I ended up moving the left wall in from where it was. I didn't need as much space as I thought.

Next up, the flooring. I'll be using spruce wood planks, green wool, and cyan wool. Line up the carpet with the left oak wood wall, like in the screenshot.

Y'know, you don't need to use the blocks I do. I do encourage creativity. If you want to, you could build the house out of jungle wood planks. However, I am using the blocks that I find look best for this build. This is a template I invented for testing how wool colors look together. Try building it, and finding a good color combination yourself! Pick a color for carpet, and for a couch.

Moving on, now we need to build the walls up. Make sure to punch out where you will put the windows. It doesn't matter when you put in the glass, but I'll save them for closer to the end. Oh, yes. I also put in a staircase. When you do add one, make sure it's out of the way.

Random song parody: Building N8than style! :D
Next, we need to put the roof on! Place down a big rectangle of building material. (Your building material must have a half-slab variant.) I'll use sandstone. In front, make a line of wood.

Okay. The initial roof is done, but isn't it dark? Let's fix that problem.

I recommend either setting the time to night, or waiting until night to make sure the house is well-lit, even without sunlight, because you don't want THIS guy in your new place. (Don't worry. I used commands to turn off mob griefing here, but you may not have that.)

The obvious part is to put up torches, but some areas of the ceiling are dark, like this one.

To solve that, you can make little glowstone lighting fixtures.

If you are in survival and don't have access to glowstone, you can do this as an alternative:

Anyway, back to the roof! Make a half-slab slope, placing wood like this, going up until the two sides meet.
Once this is done, consider the house near complete.

Don't forget to put in some flooring!

Also, if you see any gaps like this, I recommend filling it in, like in the below picture.

As an alternative, you can make use of this space. If you put upside-down slabs there, you can put chests under the roof.

When the roof is done, it should look like this.
Now, we can go decorate the loft! (Oh, yes. I added a back deck!)

Psst! You can put slabs in the ceiling like this for more headroom! (Note: beds still can't spawn you under a two and a half-block high ceiling.)

Make a carpeted area for your bed and whatnot. (Remember, you don't have to decorate the way I do!)

Below: with the furniture. The important part here is to make sure the beds will set your spawn to the space with a three-block high ceiling. If you try to spawn under a two-block high roof, Minecraft won't allow. As a preferred location, Minecraft will set your bed spawn to the right or left of the foot of your bed. Try obstructing it with other beds, the wall, or a bedside table drawer. That way, it will put you in front of the foot of the bed.

If you want to have pets, like a nice, mellow kitty companion, or a playful wolf, you can make a basket! (Yeah, the cat's Siamese. For some reason, I only ever get this type. If not, black. I've never actually gotten a tabby.)

By the way, if you get this lighting bug, don't rely on it. It may not be there when you reload the map, at night, and it may get fixed at any time. Who knows?

Well, at this point, I think the house is done! You can decorate the place any way you like, but here's how I decorated my house!
The Kitchen

What time is it? You have three seconds.
You got it! It's time for the Impromptu Random Bonus Screenshot of the Day!
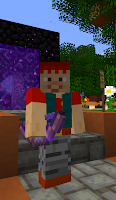
Today, we see a slime in the Nether Hub on the server!

My caption: The dungeon of Lord Floppy! Enter if you dare!
Bonus caption add-on: I think I will and steal his title! I am half Magma Cube, after all.
Back to showing my beloved followers the house interior!

The Loft
(Sorry for the moonlight glitching in. :p)

Well, that's it for today!
Sorry for not posting much lately. I would highly appreciate it if you left suggestions, and as always,
thanks for stopping by my blog!
See you next post. Until then!
Subscribe to:
Posts (Atom)
\8D/
My ever-changing Minecraft skin...
Fire_Cat2000's Blogs
-
Brown Paper Bag Owl Craft - Fire_Cat Here!! And welcome back to another post. Today we will be making... This Cutie!!! This Brown Paperbag Owl craft is easy to make and fun. Let's ...

-
More Food "Monday" # 3 - Pancakes - Fire_Cat Here! And welcome back to More Food Monday. (Wellllll, Tuesday.) On today's menu are... Pancakes!! Let's get started! First step, put togethe...


Post a Comment