Wednesday, November 26, 2014
Texturing in the Clouds - New Texture Pack and Texturing Map in the Works!
Hello, I'm N8thanH, and welcome back to Across the Map!
In today's post, I am proud to reveal two projects of mine, which are currently being worked on simultaneously.
The first is something I had started a long time ago, and kind of forgot about: a texture pack creation world. It was originally just going to be a demo world, so I could get into texture pack reviews on YouTube, since I was inspired by a YouTuber named CocoSmackdown, who had an interesting showcase series.
Since I rediscovered this map, its purpose has kind of changed to a world that you can download, and go about completing textures in. (Sorry, I don't have a download yet; the map isn't nearly complete.)
My second new project is, well, my own texture pack, called Cloud 16. It's more-or-less a 16-bit-style texture pack, which I will show off in a bit. It's the reason map development hasn't gone faster, but I have been enjoying the experience. Just bug me in the comments if you want me to pick up the slack. I'll take any attention I'm given. XD
Back in the day of 16-bit game consoles, they didn't have it easy. They didn't have every color in the world, and at least in the case of the Super NES, could usually only display 128 different colors at a time, out of a pallet of 13,768, or, if an extra bit is given to a color, then about 16 thousand. It sounds like a lot, but on the Red/Green/Blue (RBG) color channels, you can use only every 8th level on typical channels, which can do 0-255 on each color.
The colors differ quite drastically, so you need to use techniques that you wouldn't normally, such as dithering. Here, I'll post my texture for Dark Oak Wood down here, so you can see what I did, along with FreshCraft, another incomplete pack of mine. I've used it a lot in past posts.

I think that the Dark Oak still looks good in Cloud 16, but in practice, dithering only looks good from a distance, where the colors blend together. Just trust me; it looks good in-game. You'll see it soon.
Well, I digress. Getting back to the map, so far, I've completed one floating island (or as I like to say, Skisland) so far, and finished all the textures on it in Cloud 16. This is the first one, and it's a small forested island, known as Lightly Forested Forest. (In truth, I think "lightly forested" might be a bit of an understatement... :I)
The purpose of the island is to provide an environment for players to focus on the basic blocks; dirt, grass and other ground covers, tall grass and ferns, snow, stone and the ores are all blocks of note on the Skisland. It's also meant to emulate a small forest, so hopefully the texturer (made up word for the win!) will find it inspiring.
I'm sure you are excited to see it, so let's head into the map, which I have currently named Skylight Texture Packing World. (Anybody have a name suggestion? I'm happy to consider it!)
The map is not a flat world; it's just a typical map for Minecraft 1.7. The terrain is here if people want to see it, but this map is boring.

Generally, Minecraft is only as exciting as you make it. So, I took the initiative, and made the sky interesting.

These islands were crafted using MCEdit. I copied a chunk of land out of the ground, and rounded it out. Next, I ran SethBling's Floating Island filter, to make the bottoms more jagged. I cut the craters afterwards. They are done with only one brush-stroke, which can explain the roundness.

Since I had water running off the large Skisland, I decided to flood this crater.
Now, about that Skisland... I made it a long time ago. I was going to build a town on it, but when the purpose of this map shifted, I changed my attention to making a starter Skisland, which was Lightly Forested Forest. I will make some more Skislands, then return to this one when it's time to make it.
Anyways... Right over by the crater of Lightly Forested Forest, I placed a TNT cannon, a variety that I believe is known as an Icarus Cannon; a cannon designed to launch players. On that note, let's launch ourselves.

Skszzzzzz.... POW! (Fun with onomatopoeia. :3)

This is the peak altitude! It's so high, you can't see the Skislands!


We have landed! Sorry for the lack of captions; I wanted Google to make a GIF out of these photos. It made one for me last post... :o
So, now that we are up here, let's take a look at the Skisland!

This seems like a good time to load up Cloud 16. Let's do it.

Yes, I can assure you that this isn't just a shader test effect. I guess my art style is just a lot more vibrant than the default textures. XD
So, starting from this chest, I will give you a tour while you take in my awesome new texture pack. :3

Here's the inside of it, by the way.

The book contains some poetic thoughts, and a list of blocks to texture. Don't worry if the book is inconvenient; I'll include a TXT file with the map, with all the blocks to texture.
"The last snow of the season has passed; it's time to head out and explore the wilderness. A small forest, dotted with light trees and small plants seems perfect. Why not explore, and do something fun? It seems that many people appreciate this place; to each, their own reasons. Time to head out!"
We went up that little hill seen two screenshots ago. Here, there is a small clearing, with some jungle trees and cocoa beans. Plants won't grow on this map, since I set the Random Update speed to 0 using a gamerule. Gosh, the bean items always look like rabbit droppings to me. >.>

Now, hanging an immediate right will take us to another clearing, with a Dark Oak tree in the middle, surrounded by Podzol, ferns, and saplings of all sorts.
 Do you guys think my ferns look okay? I was trying to make them look better this morning. I think they look okay. Not great; just alright.
Also, it's worth noticing these little snowdrift with some snowballs on them. These are supposed to be melting snow forts, as if some children have been playing here.

Heading counter-clockwise around the tree about a quarter of the way and going straight, we reach two things: a pile of logs, which will be in the center of the photo below this text. Slightly in the background, there is a cave. I will show you a better angle in a moment. Er, however fast you can read. No pressure.

Here is the cave! I loaded the walls with ores, and random ore products left behind. Yeah, it sort of goes against the theme of this island. Luckily, it's sort of hidden.


Getting into the details of this tunnel, I decided to be kind of goofy on the signs here. I realized that what I was doing with the signs was sort of counterproductive, so I decided to poke fun at it. :V

Here are the contents of the chest. I named it before I'd place it, so people would get the idea better. :/

The Redstone is animated, by the way. I decided to use a Paint.NET plugin I have to make a GIF to show you guys. Sorry for the poor quality and if it doesn't animate for you on your choice reading device. Such is the nature of GIFs. They only have 8-bit color. You should have an idea of what that means after what we've talked about today. ;D

I believe GIFs have access to 256 colors. Not many at all... 0_0
Anyways, the only area I have left to show you is this little cave. I made this mycelium bed while I was texturing it. Also, this cave has the, ah... exit. There is also a gravel wall, should you want it.

Well, that's all I have to show for today! As always, your feedback and suggestions are appreciated, and thanks for stopping by my blog! I'll see you all next post. Until then!
In today's post, I am proud to reveal two projects of mine, which are currently being worked on simultaneously.
The first is something I had started a long time ago, and kind of forgot about: a texture pack creation world. It was originally just going to be a demo world, so I could get into texture pack reviews on YouTube, since I was inspired by a YouTuber named CocoSmackdown, who had an interesting showcase series.
Since I rediscovered this map, its purpose has kind of changed to a world that you can download, and go about completing textures in. (Sorry, I don't have a download yet; the map isn't nearly complete.)
My second new project is, well, my own texture pack, called Cloud 16. It's more-or-less a 16-bit-style texture pack, which I will show off in a bit. It's the reason map development hasn't gone faster, but I have been enjoying the experience. Just bug me in the comments if you want me to pick up the slack. I'll take any attention I'm given. XD
Back in the day of 16-bit game consoles, they didn't have it easy. They didn't have every color in the world, and at least in the case of the Super NES, could usually only display 128 different colors at a time, out of a pallet of 13,768, or, if an extra bit is given to a color, then about 16 thousand. It sounds like a lot, but on the Red/Green/Blue (RBG) color channels, you can use only every 8th level on typical channels, which can do 0-255 on each color.
The colors differ quite drastically, so you need to use techniques that you wouldn't normally, such as dithering. Here, I'll post my texture for Dark Oak Wood down here, so you can see what I did, along with FreshCraft, another incomplete pack of mine. I've used it a lot in past posts.
I think that the Dark Oak still looks good in Cloud 16, but in practice, dithering only looks good from a distance, where the colors blend together. Just trust me; it looks good in-game. You'll see it soon.
Well, I digress. Getting back to the map, so far, I've completed one floating island (or as I like to say, Skisland) so far, and finished all the textures on it in Cloud 16. This is the first one, and it's a small forested island, known as Lightly Forested Forest. (In truth, I think "lightly forested" might be a bit of an understatement... :I)
The purpose of the island is to provide an environment for players to focus on the basic blocks; dirt, grass and other ground covers, tall grass and ferns, snow, stone and the ores are all blocks of note on the Skisland. It's also meant to emulate a small forest, so hopefully the texturer (made up word for the win!) will find it inspiring.
I'm sure you are excited to see it, so let's head into the map, which I have currently named Skylight Texture Packing World. (Anybody have a name suggestion? I'm happy to consider it!)
The map is not a flat world; it's just a typical map for Minecraft 1.7. The terrain is here if people want to see it, but this map is boring.
Generally, Minecraft is only as exciting as you make it. So, I took the initiative, and made the sky interesting.
These islands were crafted using MCEdit. I copied a chunk of land out of the ground, and rounded it out. Next, I ran SethBling's Floating Island filter, to make the bottoms more jagged. I cut the craters afterwards. They are done with only one brush-stroke, which can explain the roundness.
Since I had water running off the large Skisland, I decided to flood this crater.
Now, about that Skisland... I made it a long time ago. I was going to build a town on it, but when the purpose of this map shifted, I changed my attention to making a starter Skisland, which was Lightly Forested Forest. I will make some more Skislands, then return to this one when it's time to make it.
Anyways... Right over by the crater of Lightly Forested Forest, I placed a TNT cannon, a variety that I believe is known as an Icarus Cannon; a cannon designed to launch players. On that note, let's launch ourselves.
Skszzzzzz.... POW! (Fun with onomatopoeia. :3)
This is the peak altitude! It's so high, you can't see the Skislands!
We have landed! Sorry for the lack of captions; I wanted Google to make a GIF out of these photos. It made one for me last post... :o
 | ||
| Last post's Auto Awesome. Not bad... I'm looking forward to one today! :D |
So, now that we are up here, let's take a look at the Skisland!
This seems like a good time to load up Cloud 16. Let's do it.
Yes, I can assure you that this isn't just a shader test effect. I guess my art style is just a lot more vibrant than the default textures. XD
So, starting from this chest, I will give you a tour while you take in my awesome new texture pack. :3
Here's the inside of it, by the way.
The book contains some poetic thoughts, and a list of blocks to texture. Don't worry if the book is inconvenient; I'll include a TXT file with the map, with all the blocks to texture.
"The last snow of the season has passed; it's time to head out and explore the wilderness. A small forest, dotted with light trees and small plants seems perfect. Why not explore, and do something fun? It seems that many people appreciate this place; to each, their own reasons. Time to head out!"
We went up that little hill seen two screenshots ago. Here, there is a small clearing, with some jungle trees and cocoa beans. Plants won't grow on this map, since I set the Random Update speed to 0 using a gamerule. Gosh, the bean items always look like rabbit droppings to me. >.>
Now, hanging an immediate right will take us to another clearing, with a Dark Oak tree in the middle, surrounded by Podzol, ferns, and saplings of all sorts.
Also, it's worth noticing these little snowdrift with some snowballs on them. These are supposed to be melting snow forts, as if some children have been playing here.
Heading counter-clockwise around the tree about a quarter of the way and going straight, we reach two things: a pile of logs, which will be in the center of the photo below this text. Slightly in the background, there is a cave. I will show you a better angle in a moment. Er, however fast you can read. No pressure.
Here is the cave! I loaded the walls with ores, and random ore products left behind. Yeah, it sort of goes against the theme of this island. Luckily, it's sort of hidden.
Getting into the details of this tunnel, I decided to be kind of goofy on the signs here. I realized that what I was doing with the signs was sort of counterproductive, so I decided to poke fun at it. :V
Here are the contents of the chest. I named it before I'd place it, so people would get the idea better. :/
The Redstone is animated, by the way. I decided to use a Paint.NET plugin I have to make a GIF to show you guys. Sorry for the poor quality and if it doesn't animate for you on your choice reading device. Such is the nature of GIFs. They only have 8-bit color. You should have an idea of what that means after what we've talked about today. ;D
I believe GIFs have access to 256 colors. Not many at all... 0_0
Anyways, the only area I have left to show you is this little cave. I made this mycelium bed while I was texturing it. Also, this cave has the, ah... exit. There is also a gravel wall, should you want it.
Well, that's all I have to show for today! As always, your feedback and suggestions are appreciated, and thanks for stopping by my blog! I'll see you all next post. Until then!
Thursday, November 6, 2014
Minecraft Color Spectrum: 1.8 Update!
Hello, I'm N8thanH, and welcome back to Across the Map! A while ago, somewhere over the release of Minecraft 1.8, I decided to organize every block in Minecraft into a color spectrum, as a utility I have yet to use. Nonetheless, on the slim chance that you have used it, I've provided an update to the spectrum, featuring all the blocks added in 1.8. (Sorry, guys. I don't really have anything to show for this week. Maybe I'll have something awesome next week. For now, we're doing something easy.)
So, added in Minecraft 1.8, we have...

So, I'll now do a run-through of all the categories that have been changed. Here we go!
Light-ish Gray

This chest overflowed. Here is where the Andesite actually is. :V
 I also added the Iron Door, since I forgot to put it in there last time.

Light Beige/Creamy

The Birch Door is in, and I moved the White Stained Clay here. I couldn't find a good place for it... This place just seemed better than where it was. :t
Creamy Gold
There are no new items here, but the Glowstone has been moved here. I'm not sure if Glowstone was actually included originally.

Medium Brown
The Spruce Door is in place, with the other planks of its wood type.

Dark Brown
Likewise, the Dark Oak Door finds its respective spot, with the plank colors that make it.

Red
The new default Mushroom Blocks are the ones with the outer skin on all sides. Because that's the case, it's here, now. Also, TNT has been added, for if you happen to be using it for aesthetics, or your inner griefer wants your build to match the colors of your favorite block.

Dark Orange
Red Sandstone is here! This block should had been in 1.7, when Mesas were added. :t

Light Orange
Acacia Wood is found in the Dark Orange category, but because of prominent highlights all over its texture, it finds itself here.
The orange colors in this game are so different, I had to make two categories...

Cyan
Dark Prismarine fit best here. Otherwise, this category is as empty as ever. :t

Light Blue
Here is where the bulk of the Prismarine is! I'm always happy to have more stone-ish blocks in Minecraft. What is Prismarine, anyway? For all we know, maybe it's a clay? Regardless, to me, anything in Minecraft is stone-ish if it's only collectable with a Pickaxe.

This Color (Brownish-Pink?)
Once again, we have another category with no new blocks. However, Note- and Jukeboxes are now included. Hmm... They could make a neat floor pattern. Albeit, not a modern one, but a neat one.

Warm Gray (also known as the Misfit Category)
This category only exists because of oddball clay colors. But now, it's home to the Jungle Wood Door. As to why? See previous answer. Same with the chicken egg; see last post on my spectrum. ;D

Well, that's the updated color spectrum! So, now that I've outlived my usefulness, I'll call it here for this week. As always, your feedback, which I never get, would be appreciated. But, thanks for stopping by my blog! I'll see you all next week. Until then!
Wait, you actually do want to comment? By all means, do it! Just be sure to sign in before typing, if you have Blogger. See the top of the site. There should be a sign-in up on the Blogger header. :)
So, added in Minecraft 1.8, we have...
- Granite
- Diorite (Sorry if this text is hard to read. Not helping, you say?)
- Andesite
- Iron Trapdoors
- Different Colored Doors: Spruce, Birch, Jungle, Acacia, and Dark Oak
- Prismarine!
- Red Sandstone
- Sponges, I guess... If you really want to build with that...
So, I'll now do a run-through of all the categories that have been changed. Here we go!
Light-ish Gray
This chest overflowed. Here is where the Andesite actually is. :V
White (Let's see if I hailed... I can't see what I'm typing! D:)
I added the Iron Trapdoor, along with the original Iron Door, which I neglected to add. Also, I felt that Sea Lanterns belonged here. :3
Light Beige/Creamy
The Birch Door is in, and I moved the White Stained Clay here. I couldn't find a good place for it... This place just seemed better than where it was. :t
Creamy Gold
There are no new items here, but the Glowstone has been moved here. I'm not sure if Glowstone was actually included originally.
Medium Brown
The Spruce Door is in place, with the other planks of its wood type.
Dark Brown
Likewise, the Dark Oak Door finds its respective spot, with the plank colors that make it.
Red
The new default Mushroom Blocks are the ones with the outer skin on all sides. Because that's the case, it's here, now. Also, TNT has been added, for if you happen to be using it for aesthetics, or your inner griefer wants your build to match the colors of your favorite block.
Red Sandstone is here! This block should had been in 1.7, when Mesas were added. :t
Light Orange
Acacia Wood is found in the Dark Orange category, but because of prominent highlights all over its texture, it finds itself here.
The orange colors in this game are so different, I had to make two categories...
Cyan
Dark Prismarine fit best here. Otherwise, this category is as empty as ever. :t
Light Blue
Here is where the bulk of the Prismarine is! I'm always happy to have more stone-ish blocks in Minecraft. What is Prismarine, anyway? For all we know, maybe it's a clay? Regardless, to me, anything in Minecraft is stone-ish if it's only collectable with a Pickaxe.
This Color (Brownish-Pink?)
Once again, we have another category with no new blocks. However, Note- and Jukeboxes are now included. Hmm... They could make a neat floor pattern. Albeit, not a modern one, but a neat one.
Warm Gray (also known as the Misfit Category)
This category only exists because of oddball clay colors. But now, it's home to the Jungle Wood Door. As to why? See previous answer. Same with the chicken egg; see last post on my spectrum. ;D
Well, that's the updated color spectrum! So, now that I've outlived my usefulness, I'll call it here for this week. As always, your feedback, which I never get, would be appreciated. But, thanks for stopping by my blog! I'll see you all next week. Until then!
Wait, you actually do want to comment? By all means, do it! Just be sure to sign in before typing, if you have Blogger. See the top of the site. There should be a sign-in up on the Blogger header. :)
Tuesday, October 28, 2014
Building Showcase: HowlingW0lf's House! Cozy Old-Timely Brewhouse on our Server
Hello, I'm N8thanH, and welcome back to Across the Map!
Yes, I'm back in the game, after a delayed three-month absence over the summer. My inspiration for things to do has been dried up lately, but about a little while ago, I fell in love with the world of Bluestrike again. I seem to get bored of my lonely self on Bluestrike, possibly from everyone else being bored. Then, like recently, I decide to do something on there, and the rest is history. ;D
I bumped into my old Bluestrike pal, Mintz9, who I hadn't talked to in a long time. Long story shot, his sister, HowlingW0lf has now joined us, which meant another chance for me to build a house. I hand out a coupon to familiar players, good for one free building project.

That means that this house was built to W0lf's specifications. As a pro builder, it is my job to take the customer's ideas, and turn them into something neat. That's just what I did. Without further... Rambling, here it is!

The exterior is simple, but I'd consider it to be well-balanced. Since this is a brewhouse, I decided to be creative and plant some Nether Wart outside. It's not a farm, but I've seen Howling harvest the potted wart. It's her house; I'm not objecting.
Through the double-doors is the brewshop, and the single door is W0lf's house. We will head there first, and get to the shop portion later.

As you are coming through this door, you are greeted to a narrow hallway. The door on the right is a shortcut to the back of the brewshop. On the left is this little closet. I didn't go too chest-crazy on this house.

Well, we'd might as well pop inside the shop. We're here. At the moment, it's kind of empty. I hoped that Howling would put up some signs for prices and extra info, and maybe put some ingredients in the chests... I hope she isn't worried about touching her own house. This shop feels empty. :t

Well, I can assure you that the rest of the house feels more inhabited. Let's head to the main part of the house.
Oh, yeah! I made a little writing desk in the corner, over here. Just for fun. It mostly just adds to that feeling that a place is comfortably lived in.

Moving on, here is the main living space! HowlingW0lf chose the carpet colors. They worked out better than I thought. Also, I made a point of not going too chest-crazy, although there should always be a place to put everything in any house. I'll help W0lf if she asks for cabinets in the kitchen.

On my right is the back door. There isn't anything out there, though. I may show it again if W0lf does anything with it.
We will have to backtrack a bit to see the last room: the Bedroom. It's right up these stairs.

At the top is a little... Room, I guess. There is lots of extra space on the roof, in case HowlingW0lf decides she wants another room. But, I think the house will be fine as is for now.
Here is W0lf's bedroom! She decided to let loose and go rainbow. A little color can never hurt; I'm not stopping her from doing what she wants.
One thing I usually do is place two beds next to each other to make a more appealing-looking double bed. The single bed never seemed fitting. In real life, I outgrew my twin-sized bed when I was like 11 or 10. HowlingW0lf made her bed a triple. Perhaps she likes getting centered, or maybe she just wants to live like a queen? :D

Well, that's it for today's tour. I will have to do more posts on Bluestrike soon! Don't expect to see the Japanese garden too soon, though. The second phase is a long one. I can assure you, though; it'll be worth it. If you are eager to see it, just bug me in the comment section. However, I am currently working on a Redstone ATM, and I have done some work at the Building Village. I haven't gotten any students, though. :(
Enough rambling after I've outlived my usefulness for now. If you have any suggestions or feedback, I am always happy to hear it! I recently enabled anonymous users in the comment, for your freedom of voice. Now, it'll be disabled if I see any spamming or other abuse, so you all be good. ;D
My gosh, I'm just the worst today. I'll see you all next post. Until then!
Yes, I'm back in the game, after a delayed three-month absence over the summer. My inspiration for things to do has been dried up lately, but about a little while ago, I fell in love with the world of Bluestrike again. I seem to get bored of my lonely self on Bluestrike, possibly from everyone else being bored. Then, like recently, I decide to do something on there, and the rest is history. ;D
I bumped into my old Bluestrike pal, Mintz9, who I hadn't talked to in a long time. Long story shot, his sister, HowlingW0lf has now joined us, which meant another chance for me to build a house. I hand out a coupon to familiar players, good for one free building project.
That means that this house was built to W0lf's specifications. As a pro builder, it is my job to take the customer's ideas, and turn them into something neat. That's just what I did. Without further... Rambling, here it is!
The exterior is simple, but I'd consider it to be well-balanced. Since this is a brewhouse, I decided to be creative and plant some Nether Wart outside. It's not a farm, but I've seen Howling harvest the potted wart. It's her house; I'm not objecting.
Through the double-doors is the brewshop, and the single door is W0lf's house. We will head there first, and get to the shop portion later.
As you are coming through this door, you are greeted to a narrow hallway. The door on the right is a shortcut to the back of the brewshop. On the left is this little closet. I didn't go too chest-crazy on this house.
Well, we'd might as well pop inside the shop. We're here. At the moment, it's kind of empty. I hoped that Howling would put up some signs for prices and extra info, and maybe put some ingredients in the chests... I hope she isn't worried about touching her own house. This shop feels empty. :t
Well, I can assure you that the rest of the house feels more inhabited. Let's head to the main part of the house.
Oh, yeah! I made a little writing desk in the corner, over here. Just for fun. It mostly just adds to that feeling that a place is comfortably lived in.
Moving on, here is the main living space! HowlingW0lf chose the carpet colors. They worked out better than I thought. Also, I made a point of not going too chest-crazy, although there should always be a place to put everything in any house. I'll help W0lf if she asks for cabinets in the kitchen.
On my right is the back door. There isn't anything out there, though. I may show it again if W0lf does anything with it.
At the top is a little... Room, I guess. There is lots of extra space on the roof, in case HowlingW0lf decides she wants another room. But, I think the house will be fine as is for now.
Here is W0lf's bedroom! She decided to let loose and go rainbow. A little color can never hurt; I'm not stopping her from doing what she wants.
One thing I usually do is place two beds next to each other to make a more appealing-looking double bed. The single bed never seemed fitting. In real life, I outgrew my twin-sized bed when I was like 11 or 10. HowlingW0lf made her bed a triple. Perhaps she likes getting centered, or maybe she just wants to live like a queen? :D
Well, that's it for today's tour. I will have to do more posts on Bluestrike soon! Don't expect to see the Japanese garden too soon, though. The second phase is a long one. I can assure you, though; it'll be worth it. If you are eager to see it, just bug me in the comment section. However, I am currently working on a Redstone ATM, and I have done some work at the Building Village. I haven't gotten any students, though. :(
Enough rambling after I've outlived my usefulness for now. If you have any suggestions or feedback, I am always happy to hear it! I recently enabled anonymous users in the comment, for your freedom of voice. Now, it'll be disabled if I see any spamming or other abuse, so you all be good. ;D
My gosh, I'm just the worst today. I'll see you all next post. Until then!
Tuesday, August 5, 2014
My Annoying Piston Problem
Hello, I'm N8thanH, and welcome back to Across the Map!
After going on vacation and a crazy week of summer art camp, I'm back, and also the first art student in the history of my camp to have gotten art homework. Yeah, that too. :l
I have been working on my SSP world lately; the one from my LP. I've been working on improving the map, in hopes of creating a more interesting series to watch. As you probably don't know, on this world, I live in an epic manor home. It's like my favorite thing to take screenies with. It's very large, but very comfortable, and I have improved it lots since I built it, and continue to make it more awesome.


Enough about how great my house is, and on to what I wanted to do inside it.
Right below this text is my pantry. To find it, just hang a right at the doorway, and head through the kitchen. This is where I keep my crafting and brewing supplies, general blocks and plants, food items, excreta. It's quite organized.

On the other hand... My closet? Not so much. Ironically, it's directly above the pantry. It's not as fancy, but the chests themselves are just as organized. :p

This is where I keep my more personal items, and the bulkier categories of stuff. Such as my treasure...

And every wood block I own.
The hard part of living in my house is that whenever I need something from my pantry from upstairs, I have to run all the way to the other side of my house...

(Oh, yeah. There is my cat, Fuzzy Peaches! We live here together. Solo style! :D)
...Up the stairs...

...Through the bonus room...

...And into my bedroom. I effectively have to walk the length of my house twice to get up there. :/

Like I said before, my closet is directly above the pantry. For convenience, I thought, why not make a secret Slime Block spring in the floor, for when 1.8 comes out?
After much tinkering, I came up with a working floor spring, which would be ready to be installed in my house at a moment's notice, if not for a Slime Block + Piston quirk, which stops the device from working right.
Here are some screenshots of how it looks. I won't go into detail on it here, but I may do a Redstone Room episode on it, when it does what it's supposed to accomplish.

However, I will explain what happens when I push the button. First, the horizontal piston moves its block out of the way, as the regular (non-sticky) piston below it retracts. Then, momentarily, the Piston with the Slime Block attached shoots up, and retracts. The only thing is that it carries the cover block with it in this instance. Note that the non-sticky piston is just for my testing. If Slime Blocks worked the way I wanted them to, it wouldn't be needed.

Obviously, if I were to add a floor, the piston would most likely drag parts of it into the ground. So, I would need Obsidian blocks to stop it. But, of course, the goal is to make this device as subtle as I can. So, I would need to place the Obsidian below the ground. However, this would trigger the one quirk: if a Slime Block Piston's block fails to move blocks (that are normally movable), the block gets stuck.


After going on vacation and a crazy week of summer art camp, I'm back, and also the first art student in the history of my camp to have gotten art homework. Yeah, that too. :l
I have been working on my SSP world lately; the one from my LP. I've been working on improving the map, in hopes of creating a more interesting series to watch. As you probably don't know, on this world, I live in an epic manor home. It's like my favorite thing to take screenies with. It's very large, but very comfortable, and I have improved it lots since I built it, and continue to make it more awesome.
Enough about how great my house is, and on to what I wanted to do inside it.
Right below this text is my pantry. To find it, just hang a right at the doorway, and head through the kitchen. This is where I keep my crafting and brewing supplies, general blocks and plants, food items, excreta. It's quite organized.
On the other hand... My closet? Not so much. Ironically, it's directly above the pantry. It's not as fancy, but the chests themselves are just as organized. :p
This is where I keep my more personal items, and the bulkier categories of stuff. Such as my treasure...
And every wood block I own.
The hard part of living in my house is that whenever I need something from my pantry from upstairs, I have to run all the way to the other side of my house...
...Up the stairs...
...Through the bonus room...
...And into my bedroom. I effectively have to walk the length of my house twice to get up there. :/
Like I said before, my closet is directly above the pantry. For convenience, I thought, why not make a secret Slime Block spring in the floor, for when 1.8 comes out?
After much tinkering, I came up with a working floor spring, which would be ready to be installed in my house at a moment's notice, if not for a Slime Block + Piston quirk, which stops the device from working right.
Here are some screenshots of how it looks. I won't go into detail on it here, but I may do a Redstone Room episode on it, when it does what it's supposed to accomplish.
However, I will explain what happens when I push the button. First, the horizontal piston moves its block out of the way, as the regular (non-sticky) piston below it retracts. Then, momentarily, the Piston with the Slime Block attached shoots up, and retracts. The only thing is that it carries the cover block with it in this instance. Note that the non-sticky piston is just for my testing. If Slime Blocks worked the way I wanted them to, it wouldn't be needed.
Obviously, if I were to add a floor, the piston would most likely drag parts of it into the ground. So, I would need Obsidian blocks to stop it. But, of course, the goal is to make this device as subtle as I can. So, I would need to place the Obsidian below the ground. However, this would trigger the one quirk: if a Slime Block Piston's block fails to move blocks (that are normally movable), the block gets stuck.
When I tried adding the Obsidian, this was the result. The Slime Block was in the way of the horizontal Piston, so it just did this. Making it so that it can't push the floor doesn't help either. It just gets jammed.
To summarize, in order for this device to work correctly, pushed Slime Blocks would need to move when failing to drag blocks. Currently, in such a situation, Slime Blocks simply get stuck. When/if this quirk is fixed, this launcher would work perfectly.
Also, it's time for the Impromptu Random Bonus Screenshot of the Day!
This one mostly speaks for itself...
My caption: This isn't creepy... This isn't creepy... THIS ISN'T CREEPY!!! Actually, it's tremendously creepy, so I was technically correct!}:D
Well, that's it for today. As always, your comments are appreciated, and thanks for stopping by my blog!
I'll see you all next post. Until then!
Subscribe to:
Posts (Atom)
\8D/
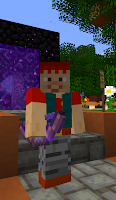
My ever-changing Minecraft skin...
Fire_Cat2000's Blogs
-
Brown Paper Bag Owl Craft - Fire_Cat Here!! And welcome back to another post. Today we will be making... This Cutie!!! This Brown Paperbag Owl craft is easy to make and fun. Let's ...

-
More Food "Monday" # 3 - Pancakes - Fire_Cat Here! And welcome back to More Food Monday. (Wellllll, Tuesday.) On today's menu are... Pancakes!! Let's get started! First step, put togethe...

Post a Comment